I get it, you want to know about inai simple cantik. It’s a beautiful and simple henna design that many people are after. But let’s be real, finding or creating one can be a pain.
So, I’m here to help. I’ll break it down for you with clear definitions, step-by-step instructions, and practical examples. Trust me, by the end of this, you’ll have a solid understanding of what inai simple cantik is and how to achieve it.
Got questions, and good. I’ve got answers.
Let’s dive in.
What is Inai Simple Cantik?
Inai simple cantik is a term that refers to a minimalist and elegant henna design. It’s all about simplicity and beauty, without the fuss.
I once asked a henna artist, “What makes inai simple cantik stand out?” She replied, “It’s the balance. The design is clean, not too intricate, and it highlights the natural beauty of the skin.”
- Minimalism: Simple lines and shapes.
- Elegance: Graceful and refined patterns.
In many cultures, inai plays a significant role. For example, in Indian weddings, henna is a symbol of good luck and joy.
“Every design tells a story,” another artist told me. “Inai simple cantik is perfect for those who want something meaningful but not overdone.”
So, whether you’re getting ready for a special occasion or just want a beautiful design, inai simple cantik is a great choice.
How to Choose the Right Inai Design
Choosing the right inai design can feel overwhelming. There’s so much out there, and it’s easy to get lost in the options.
First, think about the occasion. Is it a wedding, a casual hangout, or something else? The event sets the tone for your design.
Your personal style matters too, and don’t just go with what’s trendy. Pick something that feels like you.
It’s your skin, after all.
Skin type is another key factor. Some designs might not work well if you have sensitive skin. Trust me, I’ve been there.
Now, let’s talk about some popular inai simple cantik designs. These are often simple yet elegant, perfect for a variety of occasions. For example, a small, delicate flower can symbolize beauty and grace.
A minimalist geometric pattern might represent balance and harmony.
Customization is where you can really make it your own. Add a personal touch, like a small initial or a meaningful date. This makes the design unique and special to you.
Remember, the best inai design is one that makes you feel good. So, take your time, consider these factors, and choose something that resonates with you.
Step-by-Step Guide to Applying Inai Simple Cantik
First, let’s gather the essentials, and you’ll need henna paste, cones, and applicators. The henna paste should be fresh and have a smooth, creamy texture.
Before you start, make sure your skin is clean and dry. This helps the inai adhere better. Mix the henna paste if it’s not already prepared.
It should have a consistency similar to toothpaste—thick but spreadable.
Preparation
Clean your hands or the area where you’ll apply the inai. Use a gentle soap and pat dry. (This step is crucial for a long-lasting design.)
Now, prepare the henna paste. If it’s too thick, add a little lemon juice or water. Stir until it’s just right.
The paste should feel cool and slightly grainy on your fingers.
Application
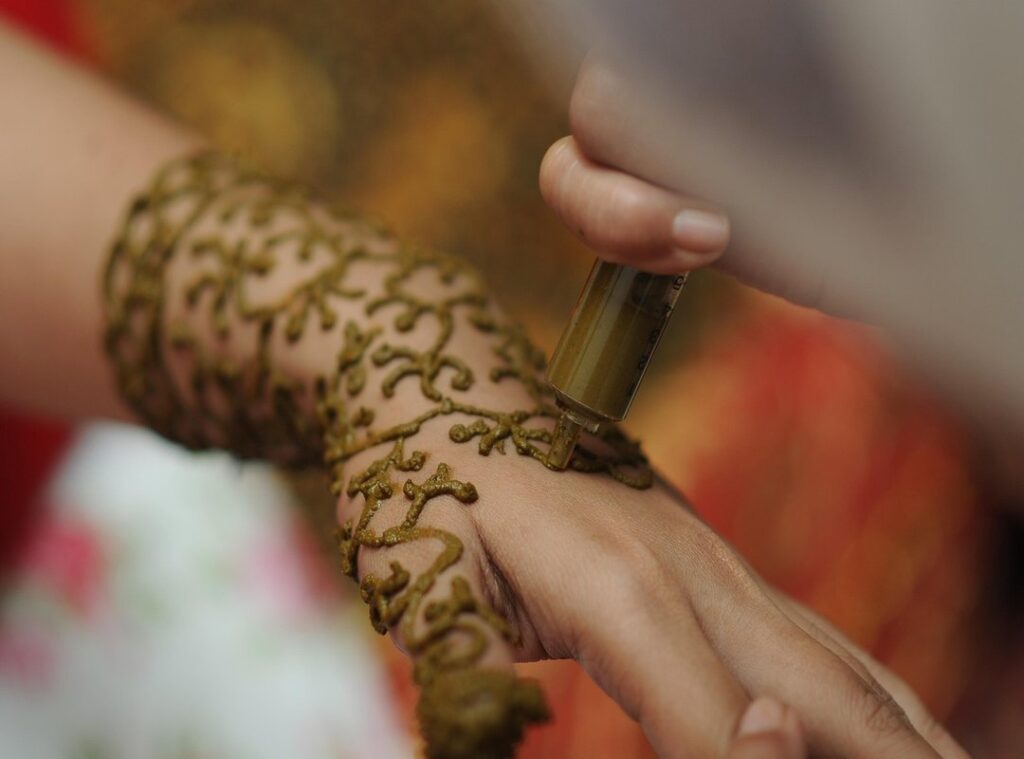
Start by drawing the outline of your design. Hold the cone or applicator at a 45-degree angle. Squeeze gently to create a steady flow of paste.
The smell of henna, earthy and slightly sweet, fills the air as you work.
Fill in the design with the paste, moving slowly and steadily. The key to clean lines is a steady hand and even pressure. Take your time; there’s no rush.
If you make a mistake, don’t worry. Use a cotton swab dipped in lemon juice to clean up any smudges. The paste will feel cool and slightly tingly on your skin as it dries.
Aftercare
Once the design is complete, let it dry. This can take about 15-20 minutes. The paste will harden and start to flake off.
Try not to touch it while it’s drying. read more
After the paste has dried, scrape it off gently. The design will be a light orange color. Over the next 24-48 hours, it will darken to a rich brown.
To help the inai last longer, avoid water and keep the area dry for the first 24 hours. Apply a mixture of sugar and lemon juice to the design to enhance the color and longevity.
Inai simple cantik is all about the little details. With these steps, you’ll have a beautiful, long-lasting design that looks and feels great.
Tips for Achieving the Perfect Inai Simple Cantik
I remember the first time I tried applying inai. It was a disaster. The paste was too thick, and my designs looked more like a child’s scribbles than anything elegant.
Consistency:
The key to a smooth application is getting the henna paste right. You want it to be the consistency of toothpaste—thick enough to stay put but not so thick that it’s hard to squeeze out. If it’s too runny, add a bit more henna powder.
If it’s too thick, a few drops of lemon juice or water can help.
Symmetry:
Symmetrical designs are all about planning. Before you start, sketch your design lightly with a pencil. This way, you can make sure both sides match before you commit with the henna.
It’s a small step, but it makes a big difference.
Practice:
Mastering inai takes time. Don’t get discouraged if your first attempts aren’t perfect. Practice on paper or even on your own skin.
With each try, you’ll get better, and patience is key here.
Inai simple cantik is all about balance and patience. Keep at it, and soon you’ll be creating beautiful, symmetrical designs that everyone will admire.
FAQs About Inai Simple Cantik

Q: How long does inai last?
A: Typically, inai can last 1-2 weeks, depending on the quality of the henna and aftercare.
Q: Can I apply inai if I have sensitive skin?
A: Yes, but it’s important to do a patch test first to check for any allergic reactions. Better safe than sorry, right?
Q: How can I remove inai quickly?
A: Use lemon juice and sugar to exfoliate the skin gently and speed up the fading process. It’s a simple trick that works wonders.
Honestly, inai simple cantik is a great choice for those who want a beautiful, natural look without the hassle. Just remember, the key is in the aftercare.
Examples of Inai Simple Cantik Designs
Inai simple cantik designs are all about elegance and simplicity. Let’s dive into some examples that stand out.
Design 1: A simple floral pattern with step-by-step images. This design is perfect for those who love a touch of nature. The step-by-step images make it easy to follow, even if you’re a beginner.
Design 2: A minimalist geometric design with detailed instructions. Clean lines and shapes create a modern and sophisticated look. The detailed instructions ensure you can achieve the design with precision.
Design 3: An elegant vine pattern with tips for achieving symmetry. This design adds a graceful and flowing element to your inai. Symmetry can be tricky, but the tips provided will help you get it right.
Each of these inai simple cantik designs offers a unique way to express yourself. Choose the one that resonates with you and start creating!
Mastering Inai Simple Cantik
Inai simple cantik is a traditional yet elegant form of henna art. It involves creating minimalist and beautiful designs, perfect for those who prefer subtlety. To start, gather your henna paste and tools.
Clean the area where you will apply the inai. Sketch your design lightly with a pencil, then carefully apply the henna paste. Allow it to dry completely before removing the excess.
The key to mastering inai simple cantik is practice and patience. With time, you’ll develop a steady hand and an eye for detail. Experiment with different patterns and styles.
Find what resonates with you.
Frequently asked questions often revolve around the longevity of the design and how to care for it. Keep the inai moist and avoid water for the first 24 hours. This helps in achieving a darker and longer-lasting stain.
Anyone can create stunning inai simple cantik designs with the right knowledge and practice. Don’t be afraid to try new things and make mistakes. Each attempt brings you one step closer to perfection.
 There is a specific skill involved in explaining something clearly — one that is completely separate from actually knowing the subject. Peterson Larsonicks has both. They has spent years working with gaming news and updates in a hands-on capacity, and an equal amount of time figuring out how to translate that experience into writing that people with different backgrounds can actually absorb and use.
Peterson tends to approach complex subjects — Gaming News and Updates, Player Strategy Guides, Expert Opinions being good examples — by starting with what the reader already knows, then building outward from there rather than dropping them in the deep end. It sounds like a small thing. In practice it makes a significant difference in whether someone finishes the article or abandons it halfway through. They is also good at knowing when to stop — a surprisingly underrated skill. Some writers bury useful information under so many caveats and qualifications that the point disappears. Peterson knows where the point is and gets there without too many detours.
The practical effect of all this is that people who read Peterson's work tend to come away actually capable of doing something with it. Not just vaguely informed — actually capable. For a writer working in gaming news and updates, that is probably the best possible outcome, and it's the standard Peterson holds they's own work to.
There is a specific skill involved in explaining something clearly — one that is completely separate from actually knowing the subject. Peterson Larsonicks has both. They has spent years working with gaming news and updates in a hands-on capacity, and an equal amount of time figuring out how to translate that experience into writing that people with different backgrounds can actually absorb and use.
Peterson tends to approach complex subjects — Gaming News and Updates, Player Strategy Guides, Expert Opinions being good examples — by starting with what the reader already knows, then building outward from there rather than dropping them in the deep end. It sounds like a small thing. In practice it makes a significant difference in whether someone finishes the article or abandons it halfway through. They is also good at knowing when to stop — a surprisingly underrated skill. Some writers bury useful information under so many caveats and qualifications that the point disappears. Peterson knows where the point is and gets there without too many detours.
The practical effect of all this is that people who read Peterson's work tend to come away actually capable of doing something with it. Not just vaguely informed — actually capable. For a writer working in gaming news and updates, that is probably the best possible outcome, and it's the standard Peterson holds they's own work to.